Back Up Your iPhone the Right Way Before Installing iOS 18
With the upcoming release of iOS 18 on September 16, it’s crucial to prepare your iPhone properly to ensure a smooth upgrade. Whether you own an iPhone XR or any newer model, you'll soon have access to iOS 18’s latest features.
But before you dive into the new system, it's essential to back up your iPhone correctly — particularly if you might need to revert to iOS 17 later.
Apple’s release of iOS 18 comes right after the announcement of the iPhone 16 and iPhone 16 Pro at its September event, and many users will be upgrading their software or even getting a new device. To avoid losing any important data during this process, creating a solid backup is the first step.
Why a Specific Backup Matters
Backing up your iPhone is standard practice, but when installing a major iOS update like iOS 18, you need to take extra care. While iCloud Backup is convenient — it runs automatically in the background when your iPhone is charging — it’s not ideal for situations where you might need to downgrade to a previous version of iOS. If you rely on iCloud Backup and decide to revert from iOS 18 to iOS 17, you’ll encounter a problem: you won’t be able to use your iOS 18 backup to restore the phone to iOS 17, and iCloud doesn't keep multiple versions of your backups.
To avoid this issue, you need to make a special backup, known as an archived backup, on your computer.
Creating an Archived Backup
An archived backup is a safeguard that allows you to restore your iPhone to its previous state, even if you downgrade iOS versions. Here's how to create one:
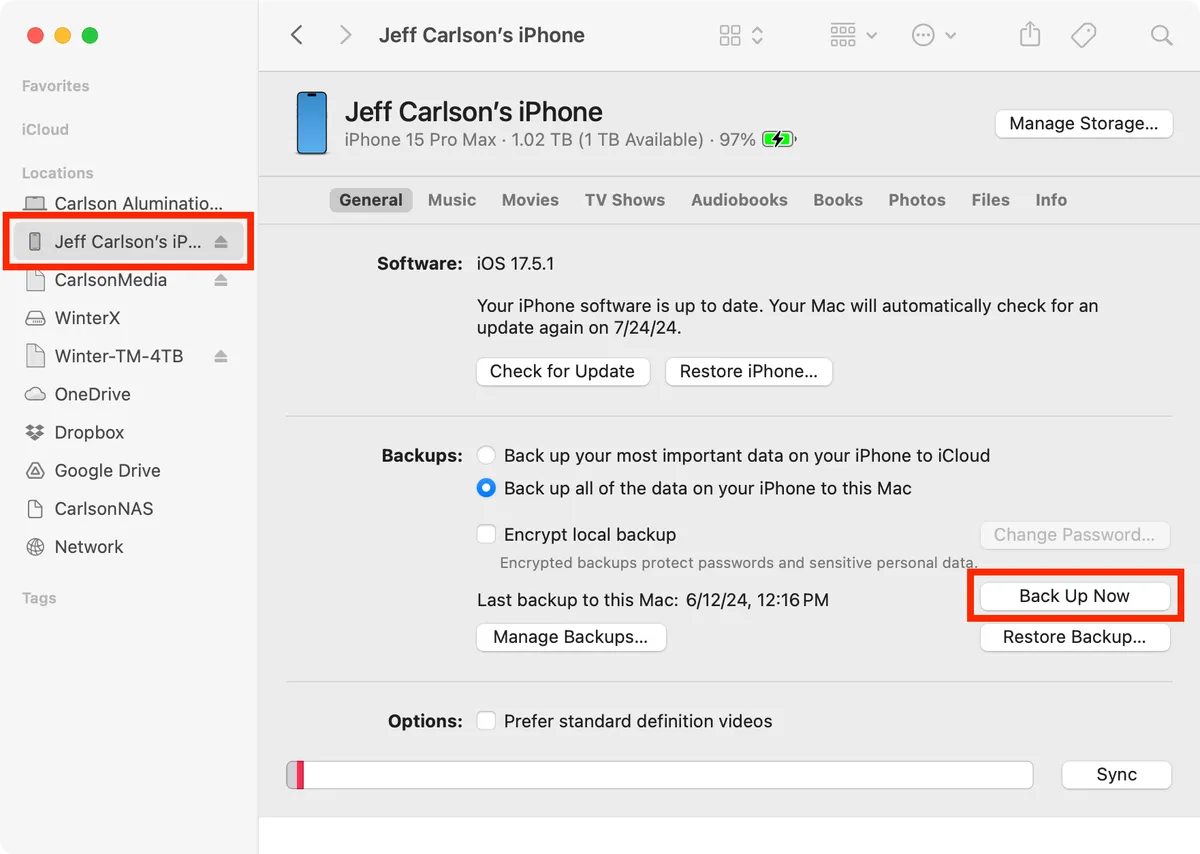
On a Mac:
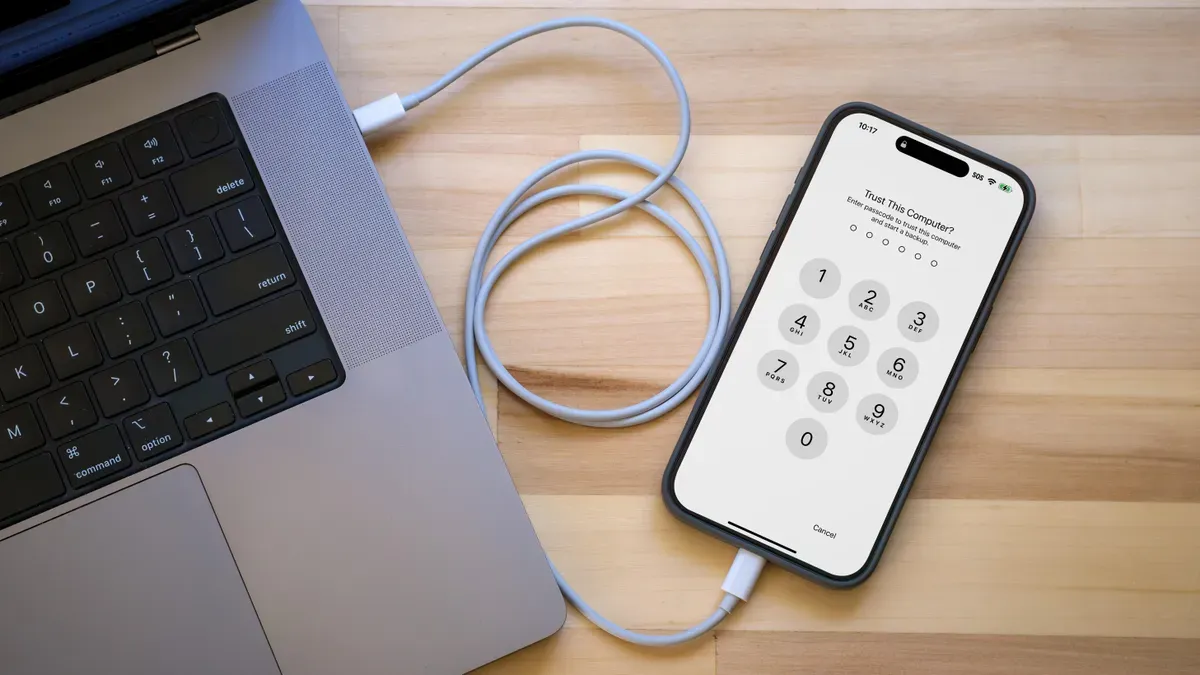
- Plug your iPhone into your Mac.
- Open a new Finder window.
- Select your iPhone from the sidebar.
- If you want added security, check the Encrypt local backup option and set a password.
- Click Back Up Now to create the backup.
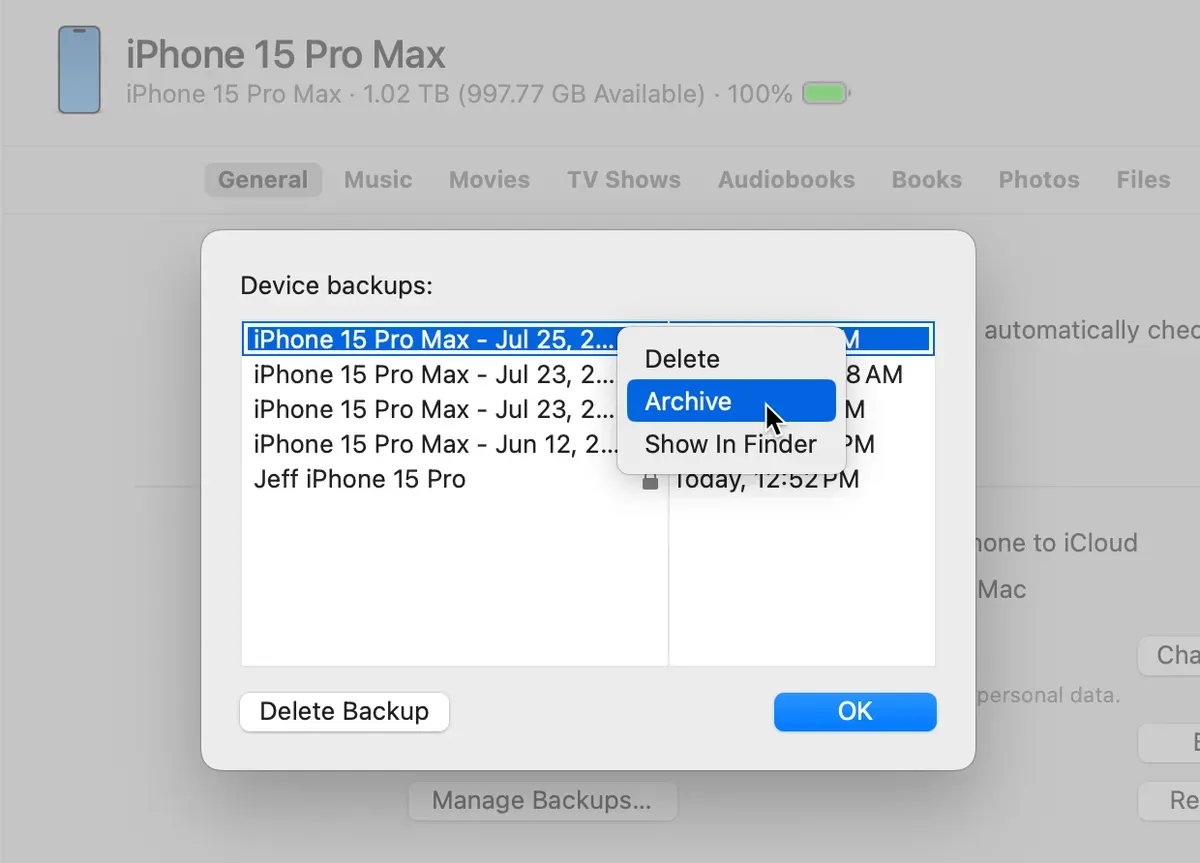
- Once the backup is complete, go to Manage Backups.
- Right-click the backup you just made and select Archive.
By archiving the backup, you protect it from being overwritten by future backups. This is essential if you ever need to restore to iOS 17 after installing iOS 18.
On Windows:
- Plug your iPhone into your PC.
- Open iTunes.
- Click the iPhone button at the top left.
- Go to the Summary tab.
- Check Encrypt local backup if desired and set a password.
- Click Back Up Now.
- After the backup is complete, go to Manage Backups.
- Right-click your backup and choose Archive.
To Encrypt or Not to Encrypt?
When creating a local backup, you have the option to encrypt it. Encrypting the backup adds an extra layer of security by protecting sensitive data like saved passwords, Health app data, and other personal information. However, you’ll need to remember the password you set for the backup. If forgotten, the encrypted backup becomes inaccessible.
Stay Safe with iOS 18
By creating an archived backup, you can confidently install iOS 18 and explore its new features, knowing you have a reliable fallback if needed. With updates like improved messaging, enhanced Apple Maps, and new Mac integration through MacOS Sequoia, iOS 18 promises an exciting experience — just make sure you’re prepared before diving in!